
The entry on our calendar just said “Rich work.” It looked like an all-day affair for one of his birding organizations. “We’re putting a sod roof on the visitor center at the Sax Zim Bog,” came the reply to my inquiry. “Wanna come and help?”
So much for asking a simple question. I had to admit to some curiosity. Just how does one create a sod roof, anyway? There was only one way to find out. I was in.
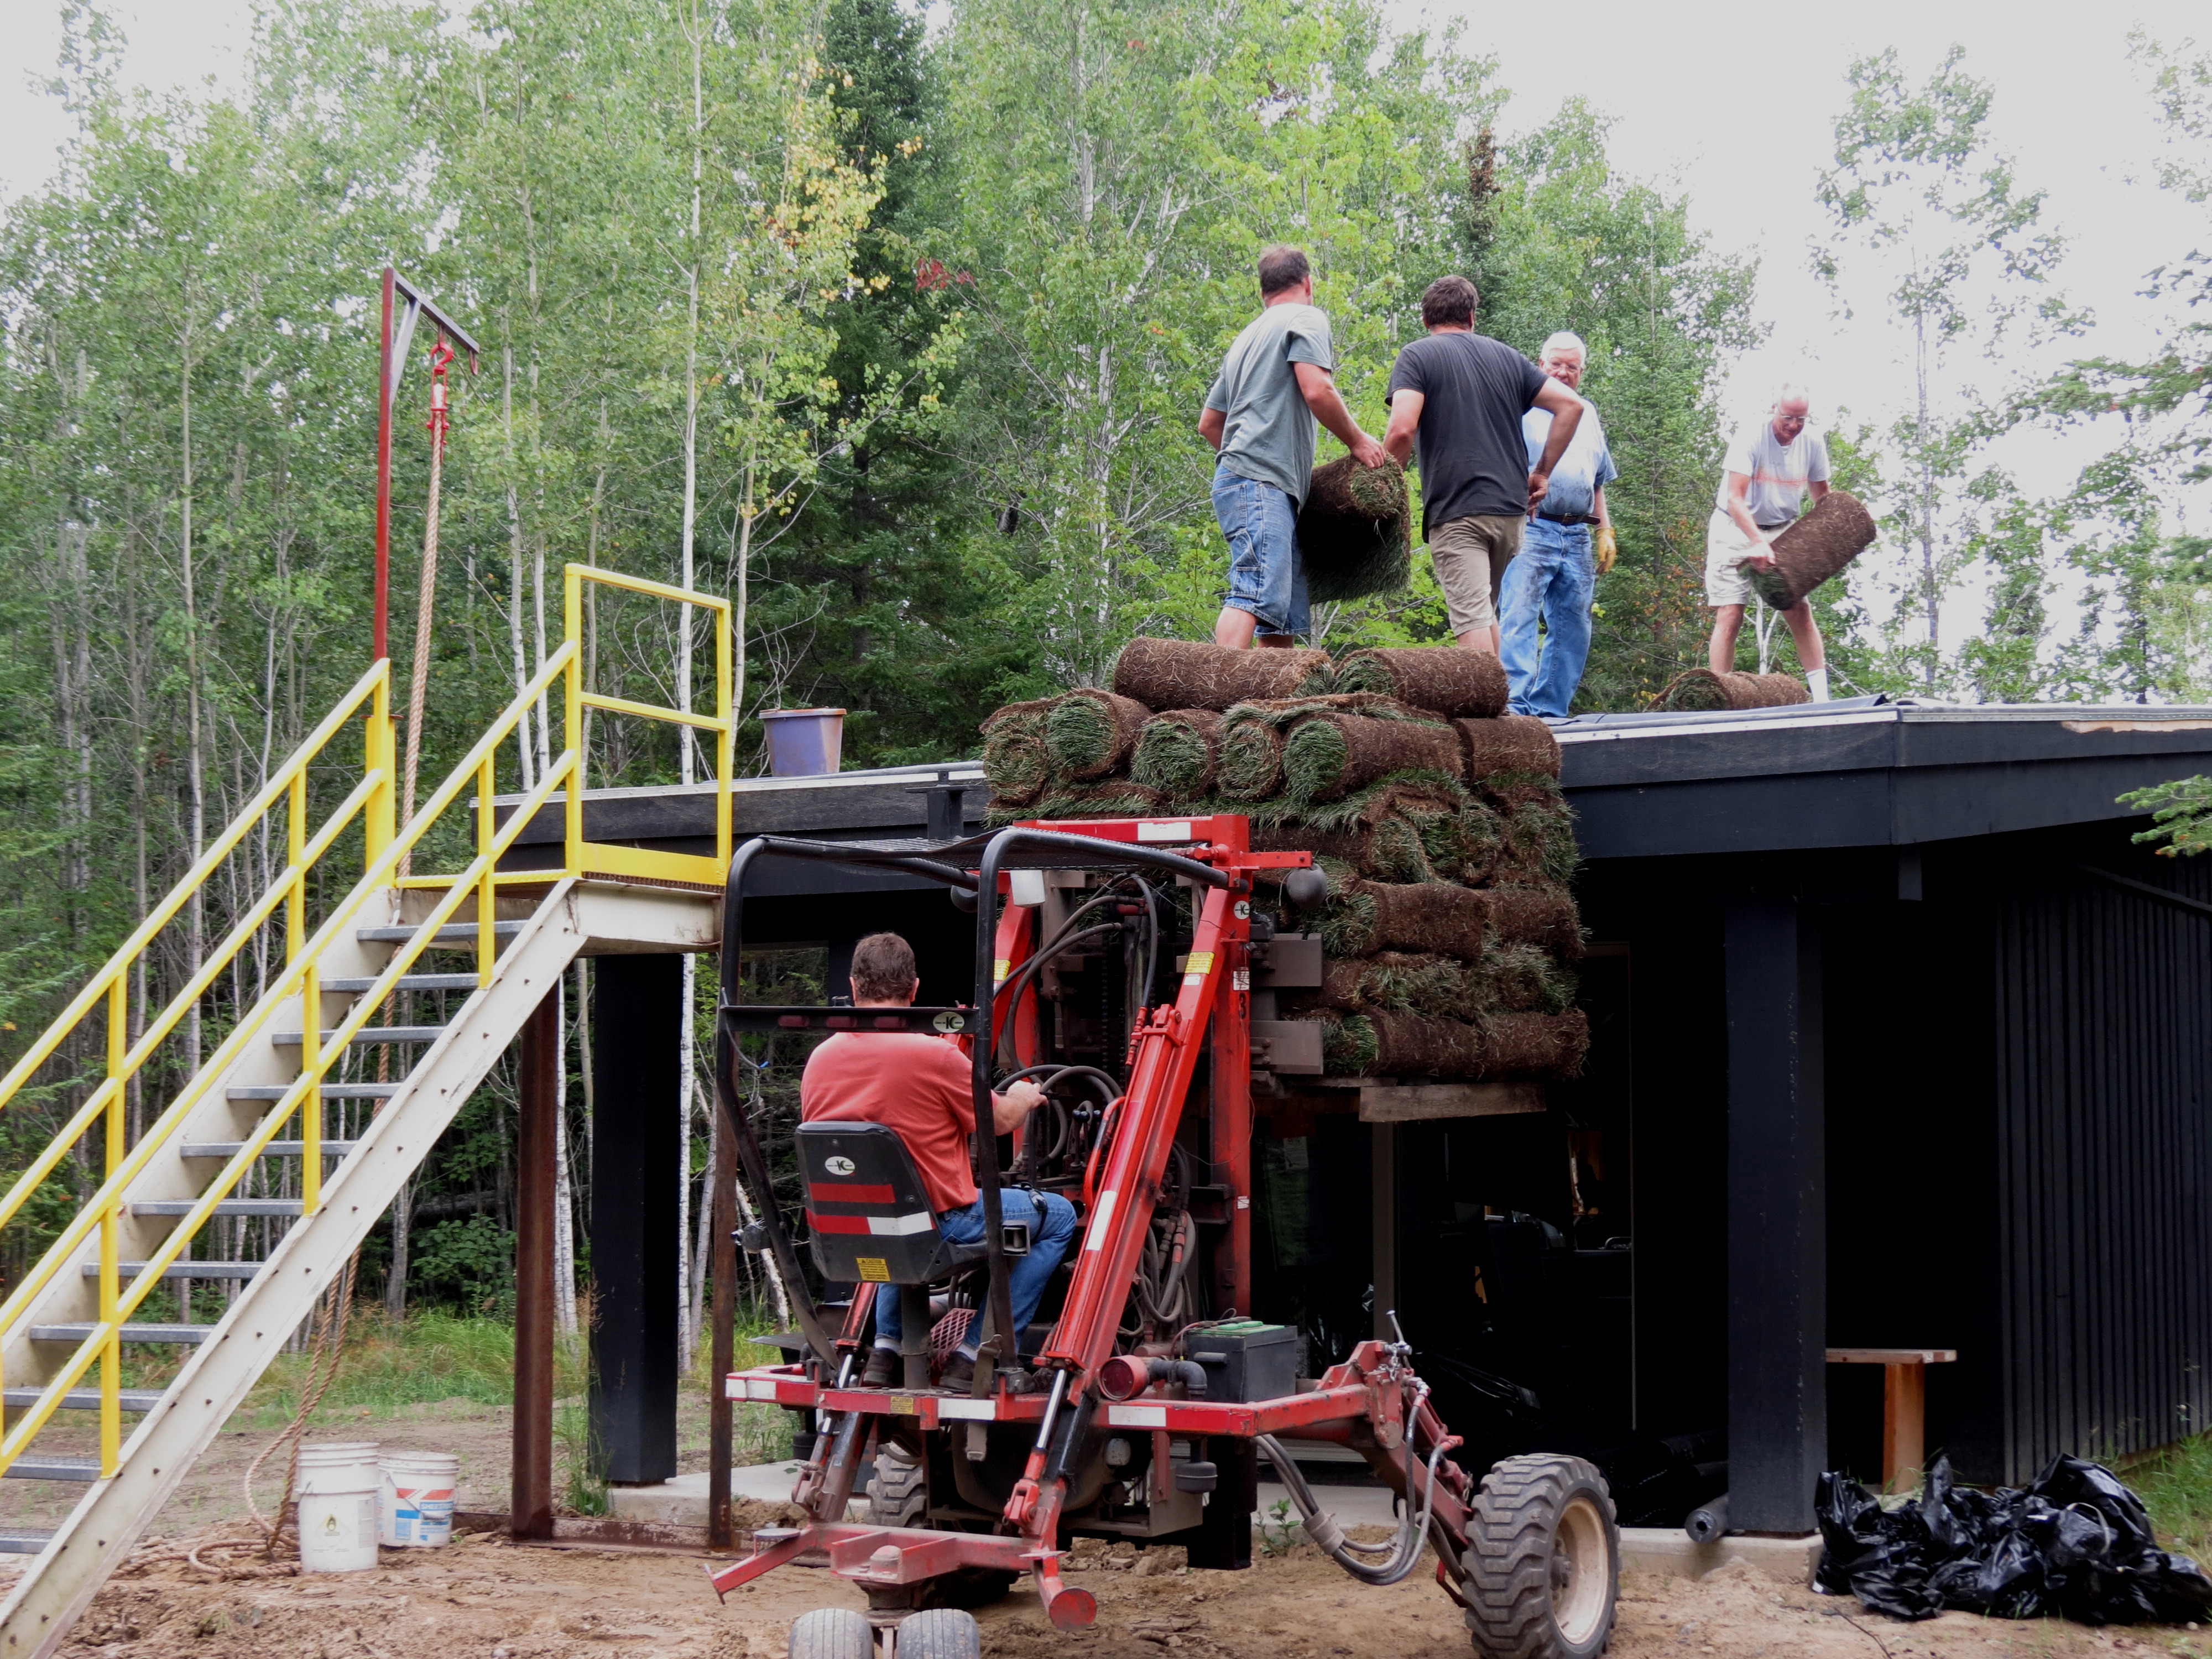 Decked out in grubby clothes, ready to battle through the heat of the day, we arrived at the same time as the sod was delivered. The roof of the center was already covered with a black underlayment, ready for its organic green canopy. As promised, there was a portable stairway adjacent to the building, eliminating the need to climb up ladders with the heavy loads. Expecting to carry roll after roll of sod up to the roof, the gathered workers were elated when the delivery truck came equipped with a small forklift. Two full pallets of sod were swiftly transported to the building and effortlessly hoisted to roof level – hooray! From there it was quick work to stash the rolls on the roof.
 Before we could lay the sod, the gutters around the perimeter had to be filled with gravel. A huge pile of rock sat at the bottom of the steps, which we tackled with shovels and buckets. Those much stronger than I could scoop up a 5-gallon bucketful in a single movement and haul two of them up the stairs. Others operated a pulley to lift additional loads to roof level. I merely shoveled. Bit by bit, slowly filling buckets for someone else to carry and distribute around the roof.
Laying the sod was the fun part. The first layer went grass side down. Apparently, that is the age-old method of doing it. The sod rolled out easily and with many hands working, the roof was quickly covered. The second layer was added in the opposite direction, and a cushy green surface soon evolved The only detail work involved was cutting the sod to fit odd spaces for perfect coverage. Left over sod was added as an extra layer on the highest portion of the roof, where the vegetation was most likely to dry out.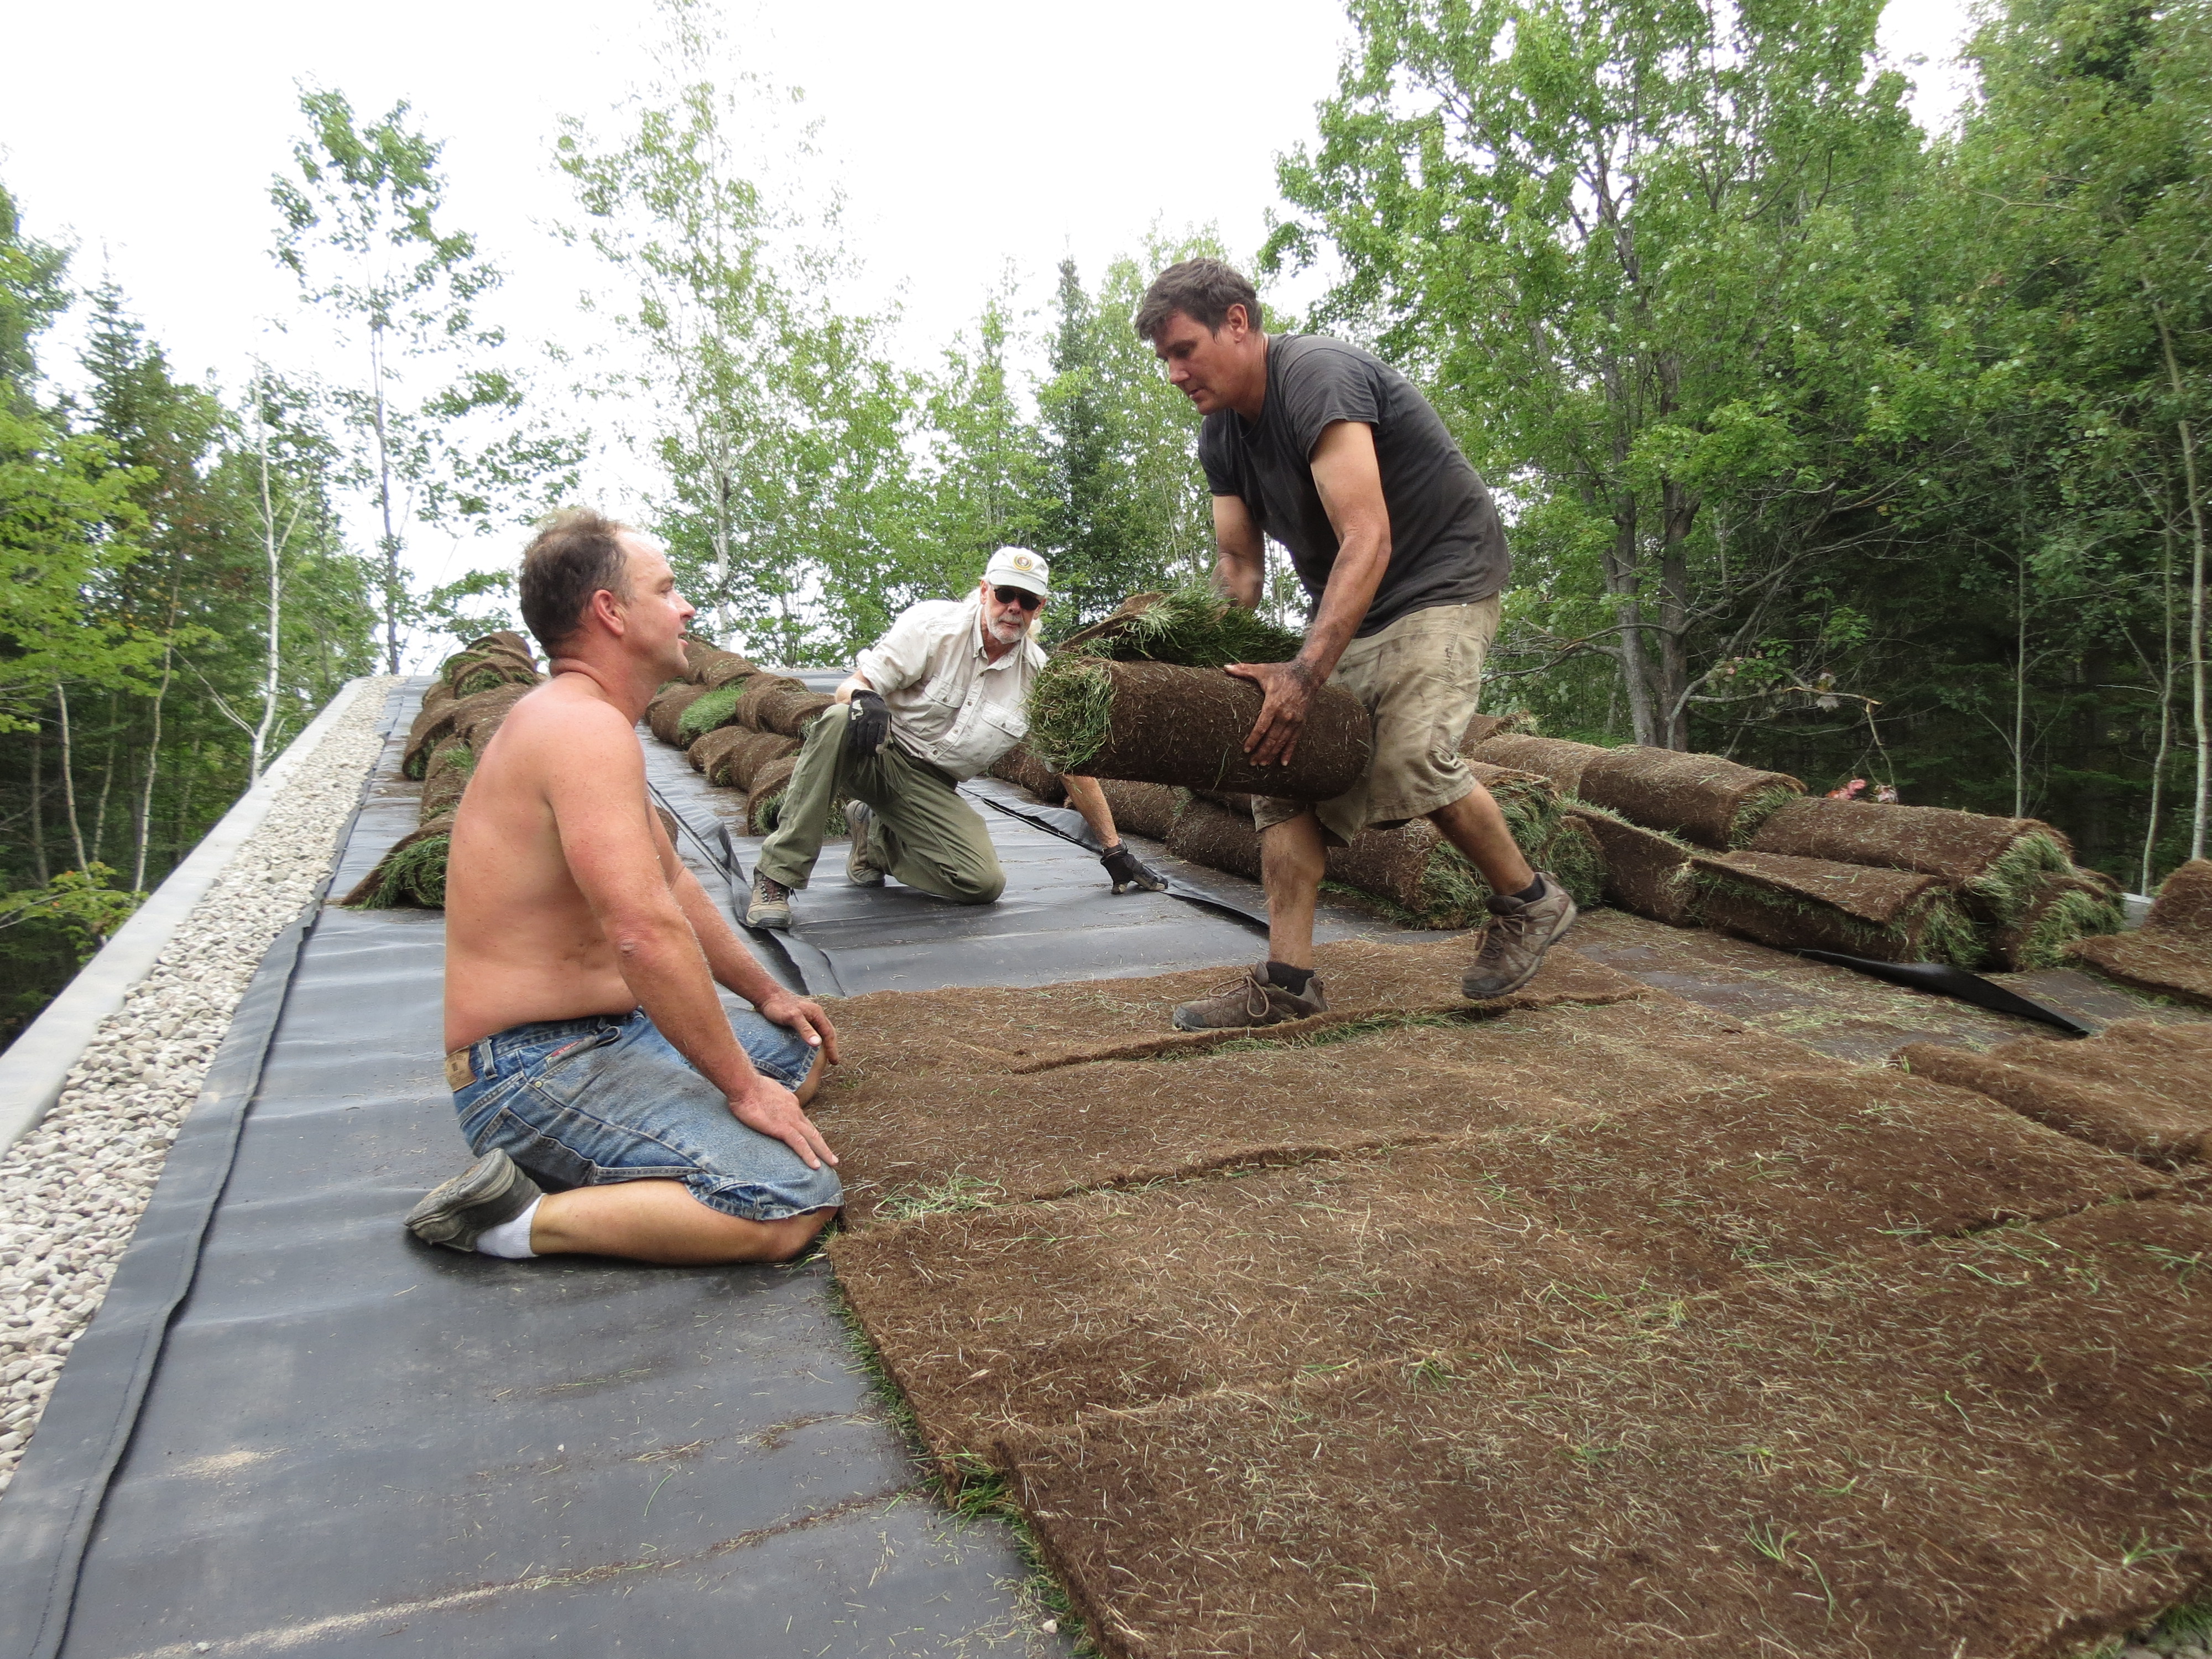
 And that was it! It wasn’t even 11:00 am when the crew posed for a group shot on the roof, congratulated themselves on a job well done, and rejoiced in having an unexpected half a day free.
 The project was not quite complete. Before our departure, arrangements were made with the local fire department to come with their pumper truck and water the new roof that afternoon.
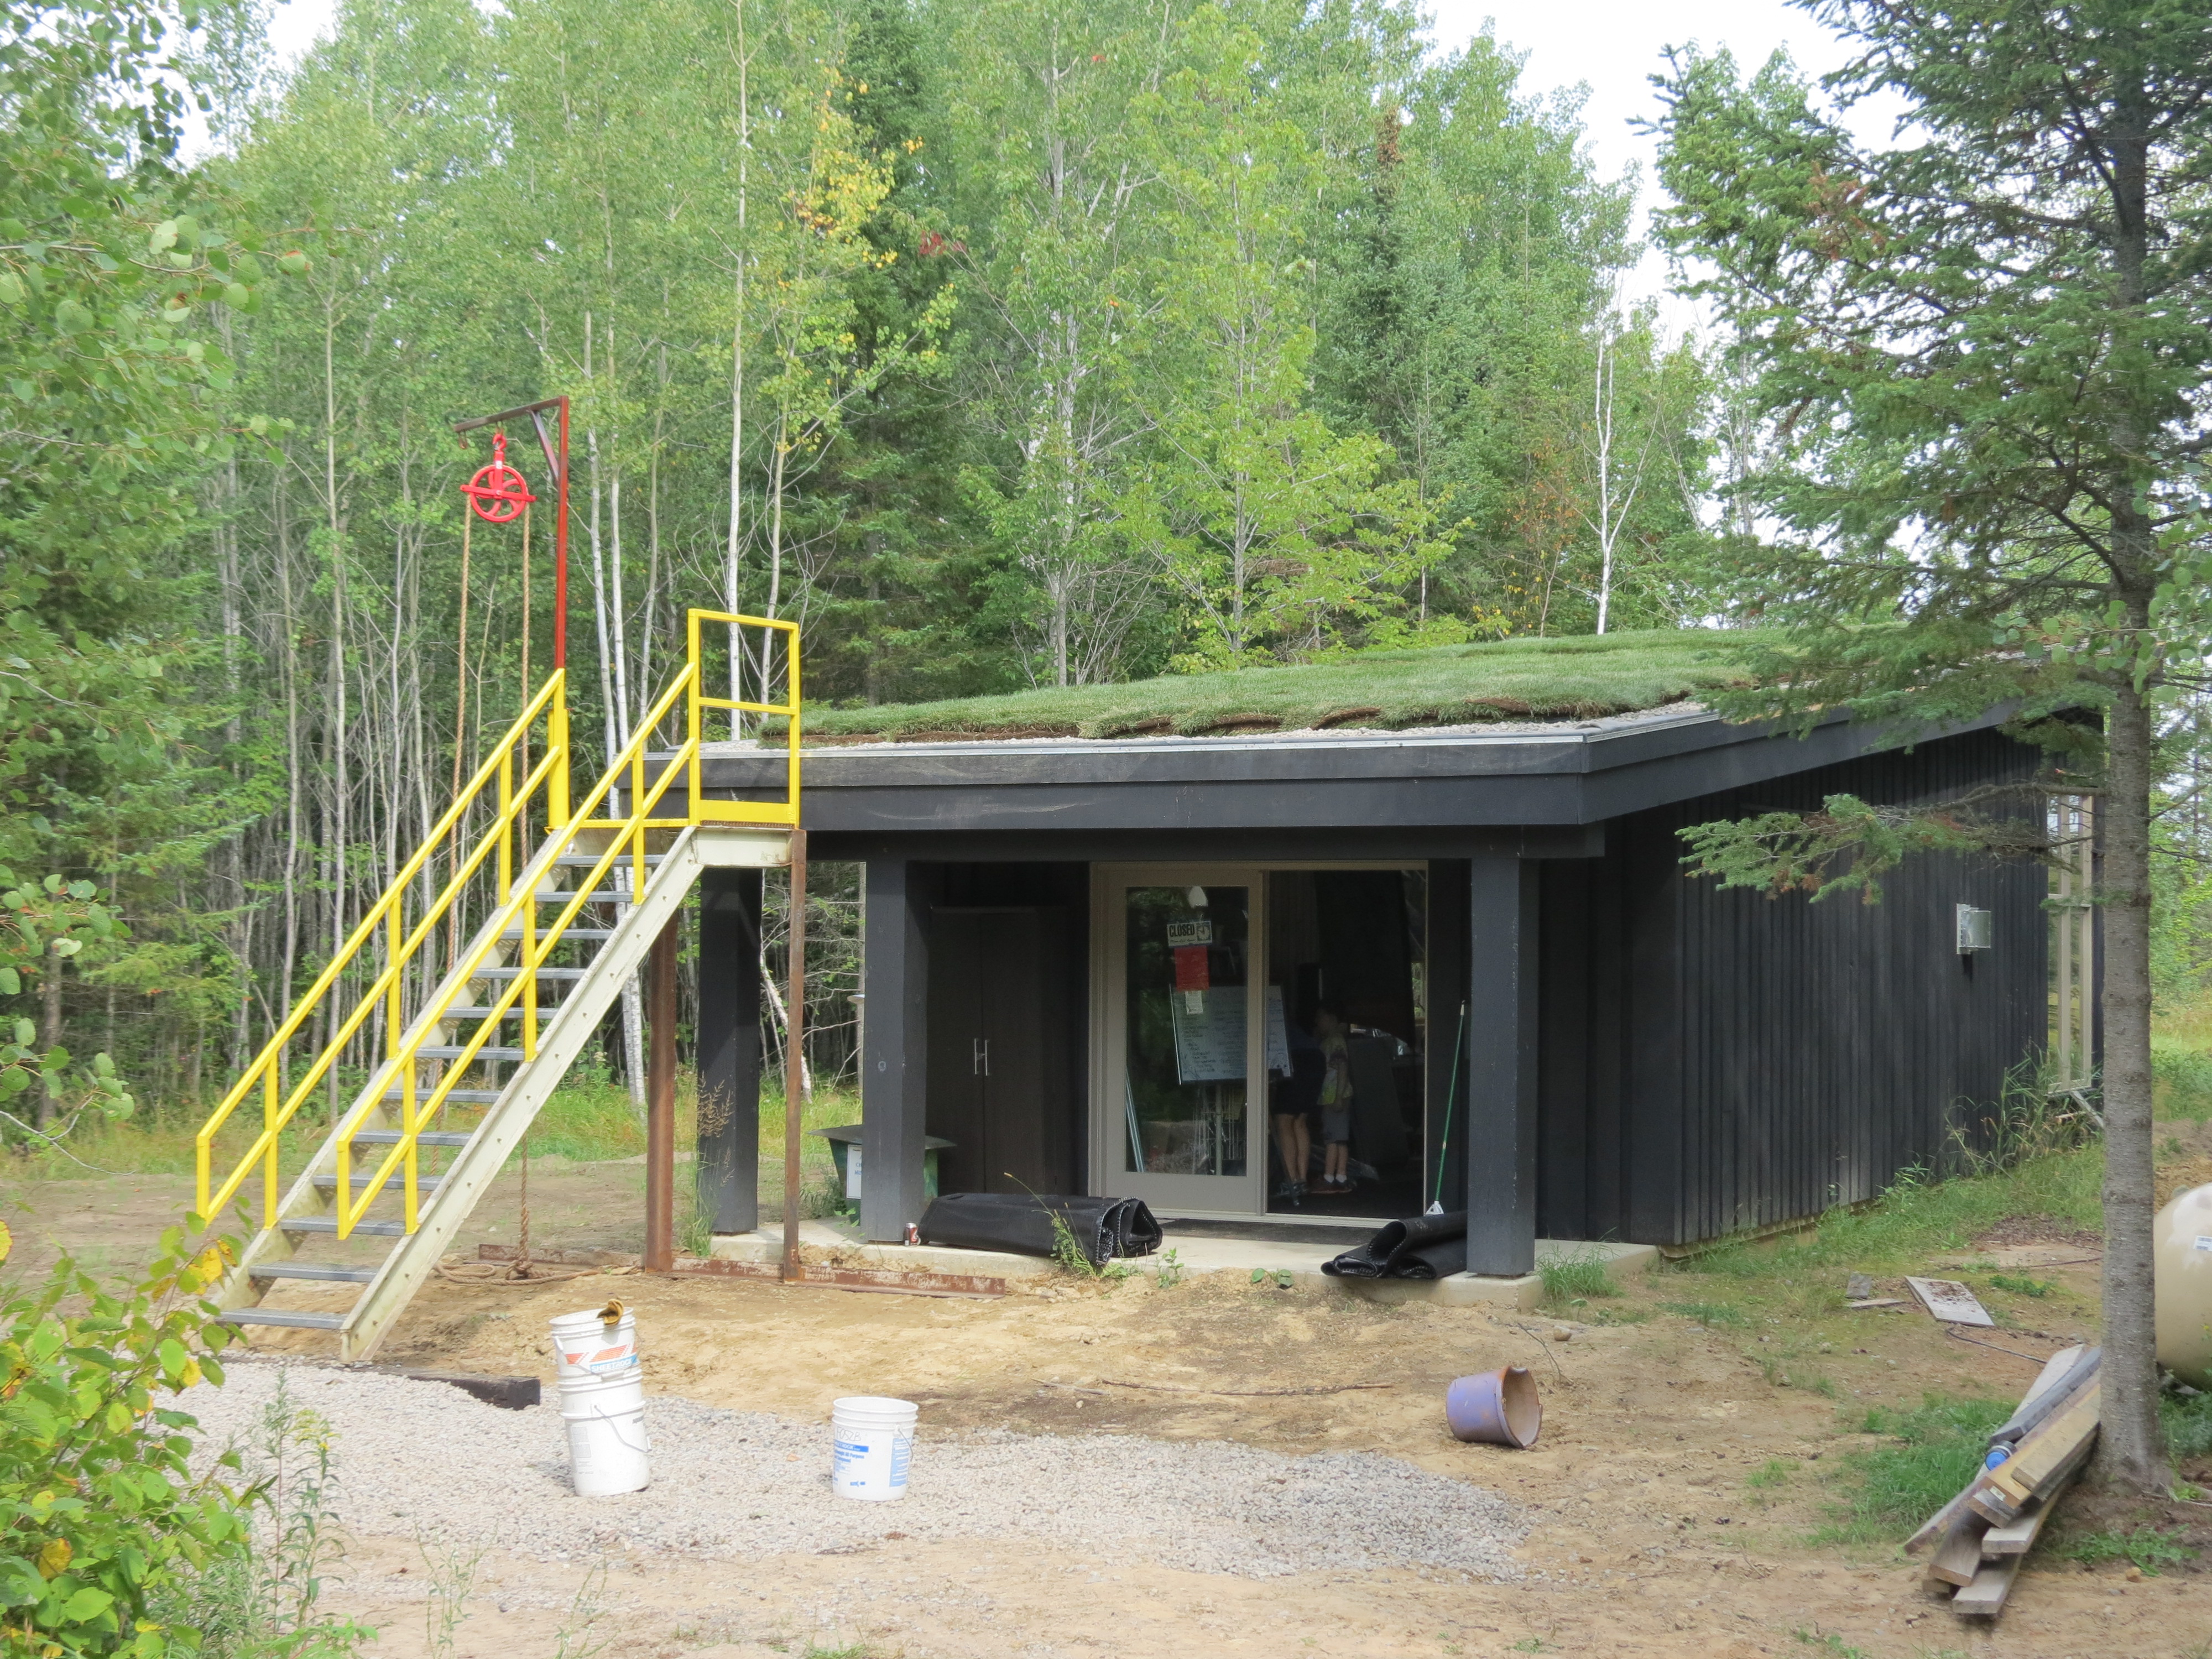
I was covered in loose dirt and swatting flies, but was glad I had joined in. I may not have moved as much rock, or rolled out as much sod as others, but it was fascinating seeing it all come together. And I’m anxious to come back years hence to view the mature growth, complete with wildflowers.
Sometimes it’s hard for me to break out of my routine and do something different. But when I do, there are always rewards. Even if I never use this knowledge again, I’ve now had my crash course in sod roofing 101.

Gorgeous roof! Wish we could have been there. We will get a chance to see it though when we come up Mid-Sept….in less than two weeks! Great job….tell Richard congratulations…that he got you to help out….LOL. Have fun at the Lighthouse! TTYL Carol